I love my friends and family! I love how they are always tagging me and sharing with me posts that they feel would help me draw inspiration. Just the other day, a friend of mine tagged me in a post from pinterest.

I wish I could properly credit this photo (so if you know where it originated from, let me know), but the website it led to wasn't in English. I tried to follow another link on google, but my computer wouldn't open the page, saying that it was not a secure page. I saw this as a fun challenge! I set out to find a pattern in English, but kept hitting one road block after another. I was able to find a website that google would roughly translate that showed me how to create the stitch, but it was for a sleeve on a crochet coat, so there was a lot of decreasing, and I couldn't read most of the written instructions.
This then led me to a youtube video, but it was all in spanish. The good news is, when I put it on mute and concentrated on her stitches, I was able to figure most of it out. I had a spanish speaking friend confirm that the starting chain was created in multiples of 4, and I was set to go! If you want to see the video, have a look:
If you have a chance to look at the facebook page of the lady that created this video, you should! Sayen's Crochet. She has some amzing talent!
Anyway! After seeing some people on pinterest asking where the English version of this pattern, so I decided I would do my best to share with you all the pattern in English. If I missed something, or if you have any questions, let me know. I am fairly new to pattern writting!
What you will need:
Worsted weight yarn: for reference I used 2.5 skeins of Big Twist Premium in Almost Aqua
Size H hook
Needle
Medium or large Pom Pom maker
Abbreviations:
CH Chain
SS Slip Stitch
SC Single Crochet
DC Double Crochet
FPDC Front Post Double Crochet
BPDC Back Post Double Crochet
TOG Together
RS Right Side
WS Wrong Side

First, start off by chaining 64, then join your chain with a SS, careful not to twist the chain.
Row 2: SC in each chain around. join to frist SC with a SS
Row 3: CH 3, then DC in each stitch around. **Your Chain 3 does NOT count as a stitch, so place your first DC in the same stitch as your join** join with a SS to the first DC

Row 4 and 5: CH 3, then *FPDC in the first 2 DC's from the previous round, next, BPDC in the next 2 stitches* Repeat from *. Join with a SS to the first FPDC. Note: Do not worry if you end in a FPDC, this hat will slouch in the end and hide the back of your ribbing

Row 6: This row sets you up for your braid stitch. You are going to CH 3, turn so the RS is facing, then *3 DC, CH 1, Skip 1,* Repeat from the * and end with a SS to the top of the CH 3. You should have 14 3DC groups. Note: The chain does not count as a stitch so your first group will look like 4 DC's as seen in the photo above.

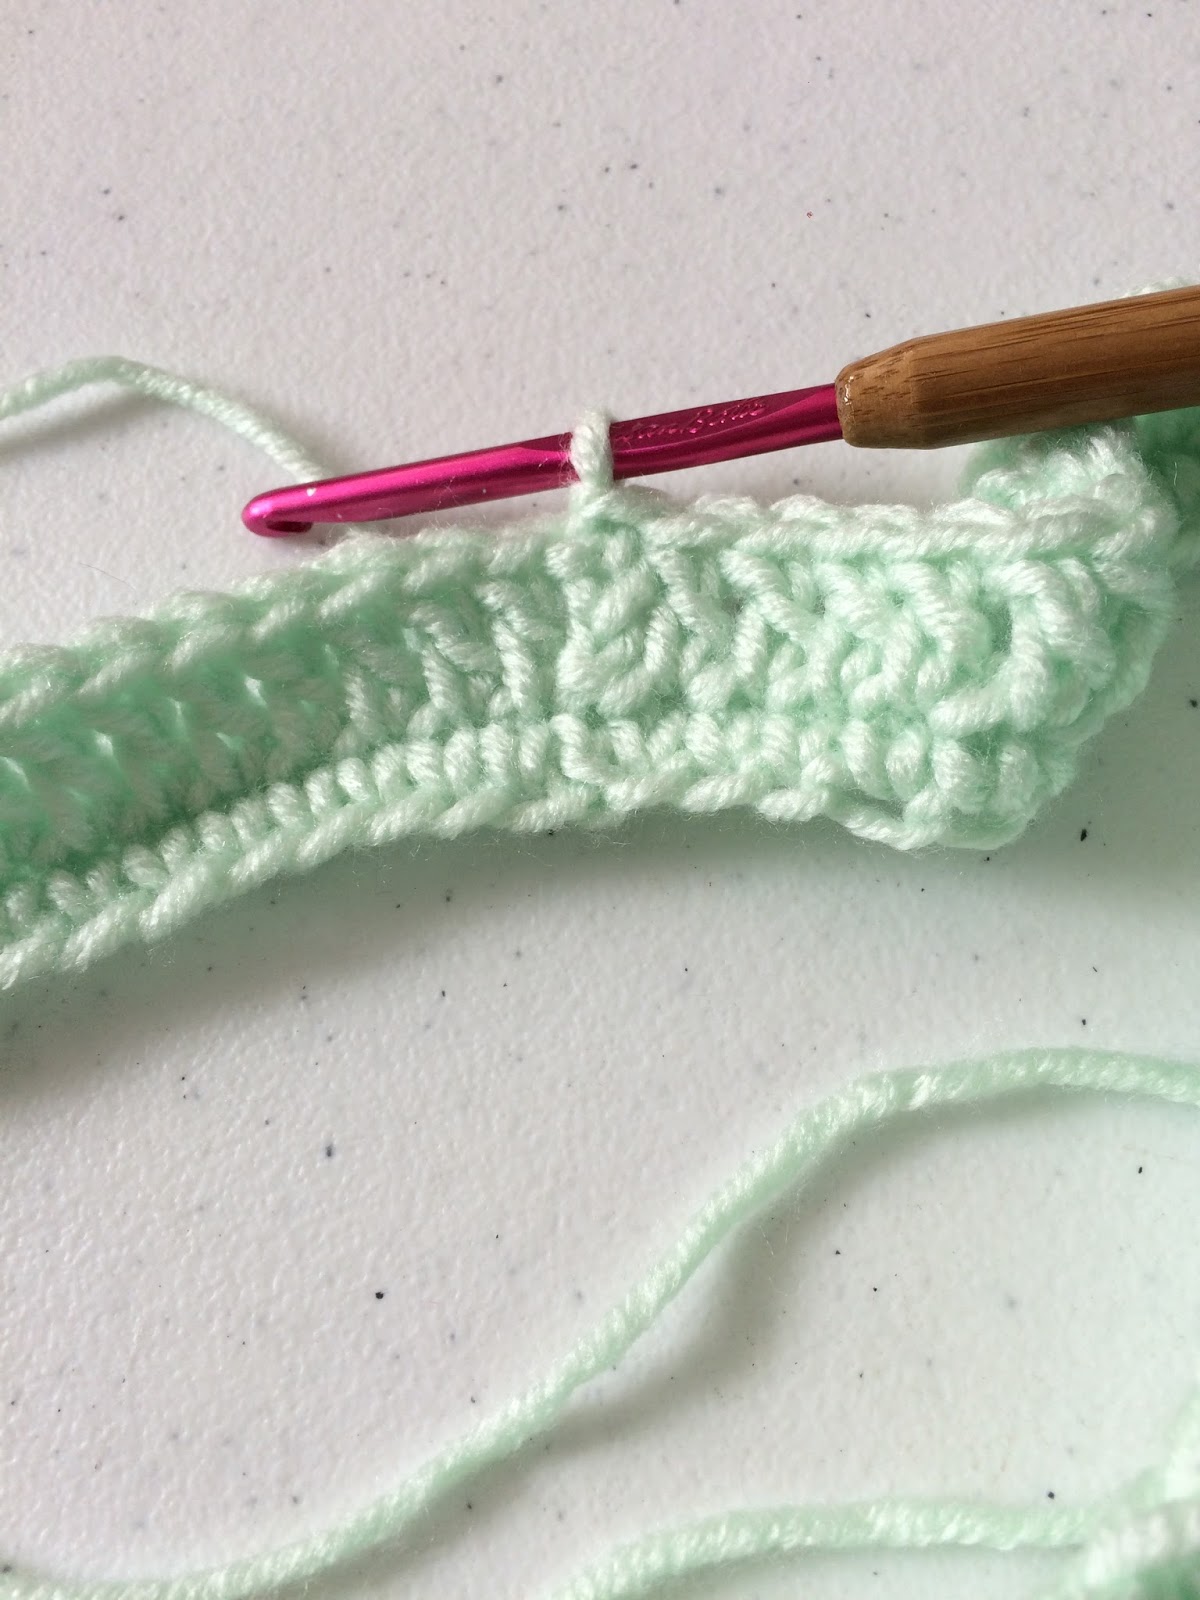
Row 7: The photo above as well as the next 4 photos will help show you what you are doing. CH4, skip the first 3 DC group, and 3 DC in the chain 1 space from the previous round.

Then, you are going to *FPDC 3 TOG around the middle DC in the 3DC group. This is where I am pointing in the photo above. Then, CH1

Skip the next 3 DC group, and 3 DC in the CH 1 Space* repeat from *

When you reach the end of this round, you are not going to CH 1 in your final FPDC 3TOG. Instead, you are going to SS in the 3rd CH in your CH 4, where I am pointing to below. You want to leave the 4th chain as your CH 1 space.


Row 8: I hope you are still following, becuase this is where it starts to get a little confusing. However, once you figure it out, the rest of the hat is a piece of cake! You will see above, that for Row 8, I am looking at the inside of the hat, This is becuase after you make your CH 4 for this round, you are going to turn your work. This is really imporant. We are not working in straight out rounds, we are turning our work with each row. Odd numbered rows, we will be looking at the outside of the hat, or the right side, RS. Even numbered rows, we are looking at the inside, or the wrong side, WS.
So, with the WS facing, you are going to skip the first 3 DC grouping, and 3 DC in the CH 1 space from the previous round. This should sound familiar since we just did the same thing in row 7.
BUT, now we need to turn our work facing the RS so we can have access to the front of the 3 DC grouping in the previous round. I have that pictured below:

So to recap, I started this round with the wrong side facing. I made a 3DC group in the CH 1 space, then I turned my work so that the front side is now facing me.

Now, you are going to need to find the center of the 3DC group from the previous round. Your FPDC 3TOG, started to create the braid, so your 3 DC group will be hiding behind it (see photo below). This is where you are going to put your FPDC 3 TOG for this round.

I have put my hook in the middle of the 3 DC to show you were you are going to find where to FPDC 3TOG

In reality, your work will probably look sideways like this photo I totally meant to leave facing sideways ;) But really, your work should look something like this. You are now going to turn your hat again, so that you are now looking at the WS.

And then you are going to 3DC in the next CH 1 space. Your 2nd set of braids will start to lay flat. It will also lay in the opposite direction as round 7.
Cliff's Notes: CH 4, turn your work to the WS. Skip the first 3DC group, and then 3DC in the CH 1 space. Turn your work so that the RS is facing, and *FPDC 3TOG in the middle DC of the 3DC group in the round below, CH 1, turn your work to the WS skip 3DC, 3DC in the CH1 space, turn to the RS* repeat from *Join with a SS to the 3rd CH in the CH4 at the start of the row.

Wrong side

Right Side
You are now going to repeat rows 7 and 8, 11 more times. You will not be decreasing at all, so your work will look like a big tube, like this:

You are going to turn your work inside out, and cut of a long tail to finish off your final round. Weave the tail in and out of the top of your hat, then pull it together to cinch it shut. Weave the tail in and out of the top of the hat to reinforce the cinch.

Finally, use your pom pom maker to make a pom pom, and attach it to the top of the hat.
If you made it this far, you are awesome! It did take me a while to finish off this hat, but I am in absolute love with the look of it! I really wish I had a model today to show you the end result on top of a head, but trust me, it is gorgeous! It did take me a while to figure it out, and the hat took a few hours to make, but I think that now that I have figured it out, it will work up much faster! I am excited to make more of these.
Have a Sassy Day!

